Category: General

How to Use Tarkov Carry Service and Safe Farming Strategies

Introduction

Escape From Tarkov is one of the most demanding shooters on the market, where every raid carries both opportunity and risk. Progress depends on how well you can farm gear, survive encounters, and manage your stash. However, many new or casual players quickly find themselves stuck. Deaths pile up, progress feels slow, and farming loot becomes stressful instead of rewarding.

To solve this, many players turn to Tarkov carry services, where experienced players help them complete raids safely and efficiently. These services can remove much of the frustration from progression by allowing you to focus on enjoying the game while still gaining valuable loot, money, and experience. At the same time, safe farming strategies give you tools to steadily build wealth on your own, reducing the risk of repeated losses. When combined, these approaches create a balance that helps players get stronger without wasting endless hours on failed raids.

What is Tarkov Carry Service?

A Tarkov carry service is a way for less experienced or time-limited players to get help from veteran players who know the maps, spawns, and loot locations inside out. Instead of entering a raid alone and risking death in the first few minutes, a carry ensures that you are protected and guided throughout the run. Carriers usually handle enemies, secure high-value loot, and guarantee that you make it out alive with rewards.

For players who struggle with survival rates or cannot spend long hours grinding, this service provides a faster path to progress. It is not just about saving time but also about reducing frustration, since you avoid repeated gear losses and wasted raids. With a carry, you can build up your stash, complete difficult quests, and access better gear earlier than you would through solo grinding. This gives you the chance to experience more of what Tarkov offers without being stuck at the starting line.

How to Safely Use a Carry Service

While carry services can be highly beneficial, using them safely is just as important. The first step is choosing a trusted provider with a good reputation. Since Tarkov has a strong in-game economy, there are always risks of scams or unreliable services, so it is essential to avoid random offers that may compromise your account. A safe carry service will never ask for unnecessary personal details, and it should provide clear rules on how the service is performed.

Another important part of safety is communication. You should know exactly what type of help you are getting, whether it is raid protection, quest completion, or loot farming. Many providers offer different options, so matching your needs with their services is key. Finally, it is wise to combine boosting with your own farming strategies. This way, you get the benefits of professional help while still learning how to survive on your own. Safe usage ensures that you progress faster without putting your account or progress at risk, making it one of the smartest ways to enjoy Tarkov without the usual setbacks.

Safe Farming Strategies for Beginners

While carry services provide fast progress, learning safe farming strategies ensures you can build up your stash even when playing solo. For beginners, survival should always take priority over high-value loot. Going into raids with cheap loadouts reduces stress and makes losses less painful. Focus on maps with predictable spawns and easier exits, such as Interchange for barter items or Woods for natural cover.

Learn where AI Scavs appear, since they can be both a source of gear and a major threat if ignored. Farming consistently means knowing when to fight and when to avoid conflict. A safe approach can help you slowly accumulate roubles, trade items, and experience without putting your entire stash at risk. The key is discipline: don’t chase every fight, don’t overfill your backpack, and always have an exit plan before engaging enemies.

Benefits of Combining Carries with Farming

The best results come from combining carry services with your own farming runs. Carriers can help you get through difficult maps and complete tough quests, while safe farming builds up your confidence and knowledge. Together, they create a system where you make steady progress both with help and on your own.

Boosted raids give you high-value loot and quest completions, while farming runs allow you to practice movement, looting, and survival without relying on others. This balance makes sure you do not become fully dependent on carries but still get the rewards they provide. Over time, you will notice that farming becomes easier because you already have better gear and a larger stash from carried runs. This mix is one of the most effective ways to grow as a Tarkov player.

Risk vs Reward in Carry Services and Farming

Here’s a comparison that shows how risk and reward change depending on whether you use a carry service or rely on farming runs:

MethodRisk LevelReward LevelIdeal For
Carry ServiceLowVery HighFast quest completion, rare loot access
Farming SoloMediumMediumBuilding experience, stash growth
Aggressive RunsHighHighSkilled players seeking rare drops

This chart highlights that while carry services reduce risk and maximize immediate loot, farming helps players steadily grow and prepare for independence in the long term.

Step-by-Step Guide to Effective Farming

  1. Pick a map you’re comfortable with – familiarity with spawn points and extraction routes gives you an edge.
  2. Choose cheap gear – pistols, budget armor, or Scav kits keep losses light.
  3. Set a clear goal before entering – focus on barter items, quests, or survival, not all at once.
  4. Move carefully and avoid hot zones – staying off the main paths reduces chances of ambush.
  5. Extract as soon as you meet your goal – over-looting is the fastest way to lose everything.

This structure keeps farming efficient while making each raid less stressful and more rewarding over time.

Advanced Tips for Long-Term Success

Once you’ve built a stable stash and understand farming basics, you can begin taking calculated risks. Instead of avoiding PvP completely, practice engagements in low-stakes raids. Carry services can still be valuable at this stage, especially if you want to access locked rooms or complete tasks that require rare spawns. Combining both strategies—occasional carries with steady solo farming—gives you the flexibility to progress faster without depending on luck. Another advanced step is using Flea Market profits to reinvest in gear that allows safer farming runs. For example, securing mid-tier armor and silencers lets you survive longer while drawing less attention. The key here is balance: take risks when the potential gain is worth it, and fall back to safe farming when you need steady income.

Conclusion

Using a Tarkov carry service together with safe farming strategies creates a strong path for both beginners and advancing players. Carry services give you quick access to gear, quests, and rare loot with very little risk, while farming teaches map control, loot routes, and decision-making under pressure. By mixing the two approaches, you cover both immediate needs and long-term growth.

The safest strategy is to think of carries as boosters for key moments, while relying on farming to keep your stash stocked and your skills sharp. This combination not only saves time but also helps you enjoy the game without constant frustration from slow progress or repeated setbacks. In the end, success in Tarkov comes from smart planning, patience, and knowing when to rely on outside help and when to push forward on your own.

Every Map, Every Raid: Total Mastery Guide for Post-Wipe Tarkov

Introduction: Map Mastery = Raid Efficiency

Every post-wipe cycle throws PMCs back into Tarkov’s high-stakes world, where even small mistakes cost time, gear, and profit.

Mastering each map gives you the upper hand: you’ll know the fastest extracts, high-value loot spawns, and tactical chokepoints before your enemies. This guide will help you transform early wipe confusion into optimized runs that maximize survival, loot, and progression.

Map Goals & Loot Priorities

Understanding what to farm at different stages of the wipe is key. Early wipe, loot availability is limited, so focus on essentials. Mid to late wipe, prioritize high-value spawns and quest items that give the best return on time.

  • Customs: Dorm keys unlock top-floor crates early-wipe, while late-wipe, gas station runs yield cash and rare weapon mods.
  • Woods: Pier and bunker routes are perfect for medical goods early, mid-wipe lumber and tool spawns are excellent for barters.
  • Shoreline: Resort basement loot and gas station runs provide high-value electronics. Opt for quiet paths to avoid heavy PvP traffic.
  • Reserve & Labs: Early wipe, focus on securing key-critical areas. Mid-late wipe, rotate to commander’s office, servers, and bunkers for military-grade loot and rare quest items.

Raid Efficiency Comparison

Efficiency depends on wipe stage and map familiarity. Below is a quick reference for planning your runs:

MapEarly-Wipe EfficiencyMid-to-Late Wipe Loot
CustomsMedium—dorm keys, extract learningHigh—weapon keys, barter items
WoodsLow—limited spawns, cautious runsMedium—documents, meds, lumber
ShorelineHigh—resort early grabs, electronicsHigh—GP coins, electronics, rare loot
Reserve/LabsLow—locked gates, key prepVery High—military-grade loot, rare spawns

Route Tactics for Each Map

Knowing map flow and extracts gives you strategic advantage. Pick routes based on early, mid, or late wipe goals:

  • Customs: Rush gas station → dorms → extract via west gate. Prioritize high-tier weapon crates first.
  • Woods: Entry via pier → bunker → rock exit. Avoid lumberyard rush until mid-wipe to minimize early PvP risk.
  • Shoreline: Lake-side cabin → power station → resort basement → waterfall extract. Silent routes reduce unnecessary fights while maximizing loot.
  • Reserve: Secure bunker key → command tent → extraction via ZB-014. Learn sniper positions to avoid ambushes.
  • Labs: Master key routes → office and server spawns → extract through main gate. Late-wipe, focus on high-value keys and quest items.

Tips to Maximize Post-Wipe Gains

  • Scout maps in offline mode to learn spawns, extracts, and choke points without risking gear.
  • Use mixed gear loadouts: budget early-wipe runs versus meta late-wipe raids for maximum profit.
  • Focus on multi-purpose keys early—they can secure loot across multiple maps for quests and barters.
  • Rotate raid types: quick extraction runs for XP, slow stealth runs for barterable loot, high-risk runs for rare gear.
  • Observe high-traffic areas—timing your movement around them improves survival and efficiency.

Conclusion: Map Confidence Unlocks Tarkov

Post-wipe success isn’t about the gear you bring—it’s about knowing where, when, and how to move. Master extract points, key spawns, map timing, and flow.

With practice, your raids will transition from risky survival attempts to highly profitable operations. Map confidence separates average PMCs from top-tier operators, making each run a calculated path to Tarkov dominance.

Map Control: Holding Power Positions All Raid Long

Introduction

In Escape from Tarkov, controlling a strong position isn’t just about having a good view. It’s about denying movement, forcing enemy decisions, and making every approach costly. The right position can feed you loot, kills, and map dominance for an entire raid. This guide explains how to secure, hold, and rotate power positions without becoming an easy target.

Identifying True Power Positions

A true power position offers more than elevation. It should control a key objective, bottleneck, or loot area.

Locations like Interchange’s tech store roof lanes, Customs’ Big Red overlook, or Reserve’s dome aren’t just scenic—they give you info on enemy movement while limiting their safe approach.

Securing Early

If you plan to hold a spot, you must reach it before the competition. Plan your spawn routes to avoid choke points and move aggressively until you’re within 50 meters of the location. Once close, slow down, clear angles, and check for early campers.

Holding Without Overexposing

  • Keep your silhouette low—avoid skyline exposure.
  • Use sound discipline—swap positions quietly between shots.
  • Rotate firing angles every few minutes to avoid predictability.

Staying alive means avoiding tunnel vision. Your goal is control, not constant shooting. Let enemies wander into your kill zone on your terms.

Information Is Control

Use scopes, headsets, and scanning to track movement across the area.

Relay information if you’re in a squad—map control is about keeping your team informed, not just getting kills. The more you know, the less your enemies can surprise you.

Rotating With Purpose

Even the best positions go cold. Once loot dries up or traffic shifts, rotate to the next high-ground or choke.

A good rule: never hold the same spot for more than 10 minutes unless it’s actively contested.

Conclusion

Holding power positions in Tarkov isn’t camping—it’s calculated dominance.

Secure early, stay unpredictable, control information, and rotate before you’re overrun. Do this, and you’ll own the raid from first shot to extract.

Boss Hunting 2025: Tactics for Every Map’s Big Threat

Introduction

Bosses in Escape from Tarkov are walking loot piles protected by lethal AI, elite guards, and third-party magnets. Beating them consistently isn’t about ego duels—it’s timing, audio discipline, and smart angles. This guide gives you practical, repeatable tactics for 2025: how to identify spawns, force safe fights, and extract before the map descends on your gunshots.

Universal Boss-Hunting Rules

  • Audio first: Learn each boss’s voice lines and weapon report. Confirm identity before committing.
  • Set the stage: Clear third-party angles before you aggro the boss. Close doors, smoke long lanes.
  • Break line-of-sight: Fight from cover that punishes pushes—door hinges, stair switchbacks, head-height cover.
  • Grenade budget: 2 frags, 1 flash, 1 smoke minimum. Grenades move bosses; bullets finish them.
  • Armor check mag: First mag should be high-pen. Swap to mid-tier once guards drop.
  • Loot discipline: Strip weapon, key barters, and tags first. Back off to stash-pack in safety.

Recommended Loadouts

Bring a reliable 5.45/5.56/7.62 platform with AP you can afford to spray. LPVO at 1×–3× covers rooms and mid-lanes. Armor class 5 is a sweet spot; class 4 works if you rely on cover. Comtacs for audio, painkillers rolling, and a light for clears.

Map-by-Map Boss Tactics (Cheat Sheet)

  • Customs — Reshala & Guards
    Likely spawns: Dorms, Gas Station, Stronghold yard. Plan: Sound-check with a wide dorms wrap; if Gas, smoke river crossing. Open with a flash into room clusters; Reshala dies fast to center-mass AP. Third-party risk: Very high—loot in two trips or drag kits to safe corners.
  • Interchange — Killa
    Likely spawns: Tech/center lanes, KIBA vicinity. Plan: Avoid straight beams. Use flanks via OLI/IDEA racks; hard flash then shoulder-swing. Track with 1× optic; aim neck/upper chest. Extract: Underground or Emerscom after a perimeter rotate.
  • Reserve — Glukhar & Squad
    Likely spawns: Train yard, bunkers, Black Knight/Rook. Plan: Snipe a guard to force a push, then hold a stair switchback. Frags deny ladder climbs. Kill guards first—Glukhar cleans up last. Exit: Hermetic or D-2 after underground sweep.
  • Woods — Shturman
    Likely spawns: Lumber mill, scav bunker ridges. Plan: Treat it as a DMR fight. Smoke a crossing, force him to peek into your LPVO. Clear flanks: sniper rock and hillside. Loot fast: Stash rifle parts, leave.
  • Shoreline — Sanitar
    Likely spawns: Resort, cottages, pier. Plan: Heals mid-fight—pressure with double-peek timing after a frag. Clear meds rooms for guards. If Resort, control stair cores; if pier, smoke docks then pinch.
  • Factory — Tagilla
    Likely spawns: Main floor, tunnels. Plan: Flash first—never ego swing the hammer. Hold hinge-side, bait foot steps, and dump center mass with AP. Extract: Door or gate immediately—sound brings the lobby.
  • Streets — Kaban
    Likely spawns: Car Dealership/Theater blocks. Plan: Own verticals. Post a crossfire with one rooftop/landing and one street off-angle. Smokes to cross, frags to move the bodyguards. Rule: Don’t beam long lanes—flank.
  • Lighthouse — Knight/Birds (Rogues/Bosses)
    Plan: Thermal/LPVO spot from hills, pick guards, rotate low along rocks. Avoid road beams. Clear roofs with frags up ladders, then push paired—one watches, one loots.
  • Labs — Raiders/Tagilla variants (if active)
    Plan: Sound is king. Flash every double door, chain frags on server/med hall pushes. Extract on first good kit; Labs is the third-party capital.

Fight Flow: Open, Break, Finish

  1. Open: Confirm boss by audio/visual. Clear outside angles, set a retreat path.
  2. Break: Frag to move, flash to enter, smoke to cross. Kill a guard first to desync the pack.
  3. Finish: Force the boss into your sightline. If he turtles, rotate once and repeat the utility chain.

Common Mistakes (And Fixes)

  • Loot fever: Fix—drag to cover, body block with a buddy, repack later.
  • Overpeeking: Fix—shoulder peek to bait; re-peek from a different pixel or height.
  • Wrong ammo: Fix—stage a single best-AP mag on top; label with a colored baseplate if you can.
  • No exit plan: Fix—pick two extracts before contact; rotate immediately after the wipe.

Conclusion

Boss hunting pays when you script the fight: confirm, control, collapse, and clear.

Bring utility, fight from cover, and extract the moment your bag is “good enough.” Do it right and every raid becomes a paycheck with a name on it.

Guns with History: Real-World Stories Behind Tarkov’s Deadliest Weapons

Introduction

Every weapon in Escape From Tarkov has a story. While players obsess over stats, recoil, and ammo types, many overlook the fascinating real-world origins of the guns they use every day in raids. From Cold War battlefields to modern special forces operations, these firearms aren’t just digital killing tools — they’re living pieces of military history. In this article, we look beyond the meta and into the legacy behind Tarkov’s most iconic and deadly weapons.

AK Series: Born from Post-War Survival

Few weapons are more synonymous with Tarkov — and with warfare in general — than the AK. Designed by Mikhail Kalashnikov in the late 1940s, the AK-47 was built for reliability in extreme conditions.

Its successor, the AKM, became a symbol of Soviet firepower across the globe. Tarkov’s many AK variants reflect decades of military evolution, from the rugged AK-74 to the modernized AK-103. The reason they’re so beloved in-game is the same reason they’re still in use today: they work. Anywhere. Always.

M4A1: The American Warhorse

The M4A1 carbine traces its roots to the Vietnam War-era M16, with enhancements that made it the standard issue rifle for U.S. military forces. Known for its modularity and controllability, the M4 is highly adaptable — just like it is in Tarkov.

In-game, players often build elaborate M4s with laser precision and tuned ergonomics, mirroring how special forces in real life customize their rifles for specific operations. It’s more than just a rifle — it’s a platform for personal warfare.

Mosin Nagant: From Empire to Escape

One of the oldest firearms in Tarkov, the Mosin Nagant has seen over a century of warfare. Introduced in 1891 by the Russian Empire, the Mosin was used through World War I, World War II, and beyond.

Its presence in Tarkov isn’t just a nod to history — it’s a reminder that old weapons can still be deadly. In-game, it’s a fan favorite for budget sniping and one-shot kills. In real life, it was a sniper’s best friend from Stalingrad to Afghanistan.

MP-153 and Saiga: Civilian Designs Turned Tactical

Shotguns in Tarkov often come from civilian or law enforcement origins. The MP-153 is a real Russian-made semi-automatic shotgun used widely by hunters and police alike. The Saiga series, meanwhile, takes AK mechanics and applies them to shotgun formats — creating devastating close-quarters firepower. These weapons weren’t born on battlefields but earned their place in tactical arsenals through reliability and stopping power. Their usage in Tarkov mirrors real-world urban and riot control roles.

Real-World Origins of Popular Tarkov Guns

WeaponCountryHistorical Role
AK-74USSRCold War service rifle
M4A1USAStandard NATO carbine
Mosin NagantRussiaWWI/WWII sniper rifle
MPXUSAModern SWAT/CT use
Saiga-12RussiaPolice/military shotgun

MPX and MP7: Modern Subguns for Modern Conflicts

Compact, lightweight, and rapid-firing — submachine guns like the MPX and MP7 reflect a shift toward urban, close-quarters combat. The MPX, developed by SIG Sauer, is used by elite units and SWAT teams across the globe.

The MP7, meanwhile, was designed by Heckler & Koch to defeat body armor with proprietary 4.6mm rounds. Both guns shine in Tarkov’s tight spaces, giving players real-world tools used to clear buildings and protect VIPs. Their sleek designs and deadly performance show how far gun engineering has come since the AK and Mosin eras.

Conclusion

Every gun in Tarkov carries more than just stats — it carries legacy. From battle-tested classics to cutting-edge firearms used by modern operators, each weapon tells a story of innovation, survival, and combat evolution.

Understanding where these guns come from not only deepens your appreciation of the game, but also connects you to the real history that inspired it. So next time you reload that Mosin or mod your M4, remember — you’re not just building a loadout. You’re wielding a chapter of military history.

A Deep Dive into Destiny 2’s Gambit Mode

Destiny 2 offers a variety of PvP and PvE content, but one of the most unique and dynamic modes is Gambit. Gambit blends the cooperative elements of PvE with the competitive thrill of PvP, creating an experience unlike anything else in the game. Introduced as part of the Forsaken expansion, Gambit has evolved over time, gaining new rules, strategies, and objectives. Whether you’re a seasoned player or a newcomer, Gambit presents a thrilling challenge for any Guardian looking to test their skills in both combat and strategy.

What is Gambit?

Gambit is a hybrid mode that pits two teams of four players against each other in a race to defeat enemies, collect “Motes,” and summon a powerful boss to win the match. However, it’s not just about defeating AI enemies—it’s about balancing PvE and PvP elements to outsmart and outplay the opposing team. While each team works to collect Motes from enemies and deposit them into a central bank, the opposing team can disrupt their progress by sending in “Invaders” to kill members of the other team. This introduces a unique level of strategy, as teams must decide when to focus on PvE activities and when to prepare for the inevitable PvP battles.

The ultimate goal in Gambit is to summon your team’s Primeval boss and defeat it before the opposing team can do the same. However, it’s not just about defeating the boss; teams must manage the flow of Motes, which are collected by killing enemies and then deposited into the central bank. The more Motes your team deposits, the faster your Primeval will be summoned, but this also opens up opportunities for the opposing team to disrupt your progress.

How Gambit Works: The Flow of the Match

The Gambit match is divided into multiple phases that blend PvE and PvP mechanics. The first phase involves collecting Motes by defeating AI enemies that spawn throughout the map. These enemies vary in difficulty and type, and some will drop more Motes than others. The key to success in this phase is efficiency—teams must quickly clear the map of enemies and collect as many Motes as possible while minimizing downtime. However, Motes are not automatically deposited into the bank—they must be carried to the central deposit location, where they can be added to your team’s total.

Once a team has collected enough Motes, they can summon a special enemy called the *Primeval* boss. The Primeval is a powerful boss that can only be damaged once a certain number of Motes have been deposited into the bank. At this point, the focus shifts to defeating the Primeval, but there’s a catch—your opponents are still active and can invade your side at any moment. This is where the PvP aspect of Gambit truly shines.

The second phase of the match introduces the “Invader” mechanic, which allows players to invade the opposing team’s side of the map and disrupt their progress. An Invader can kill members of the opposing team, steal their Motes, and delay the enemy’s ability to summon their Primeval. The challenge lies in the fact that Invaders can be killed by the opposing team, and their success depends on teamwork, timing, and communication. Invaders can also have a major impact on the flow of the game, forcing the opposing team to defend their bank and stay vigilant while still focusing on PvE activities.

Strategies for Success in Gambit

To excel in Gambit, players need to balance their focus between PvE and PvP objectives. The key to winning Gambit lies in efficient Mote collection, strategic Primeval summoning, and excellent team coordination, particularly when it comes to handling Invaders. Here are a few strategies that can help ensure success:

  • Coordinate Mote Collection: Teams should focus on clearing enemies efficiently and depositing Motes quickly. Designating specific players for Mote collection and others for defense can help maximize efficiency.
  • Manage the Invader Phase: When an Invader enters the game, teams must be ready to respond. Having a designated player for defense can help protect the team’s Motes and prevent an Invader from disrupting progress.
  • Focus on the Primeval: Once the Primeval is summoned, the focus shifts to defeating it. However, teams should be cautious about overcommitting to the fight, as this can leave them vulnerable to the opposing team’s Invaders.

It’s also important for players to consider their loadouts. Gambit rewards versatility, so having a mix of damage-dealing weapons and defensive gear is essential. Weapons like shotguns or sniper rifles are great for taking out Invaders, while autos and hand cannons can efficiently deal with PvE enemies. Modifying your gear to accommodate both PvE and PvP situations will make you a valuable asset to your team.

The Gambit Experience: Why It’s Worth Playing

What makes Gambit so engaging is its unique combination of PvE and PvP elements, which forces players to think on their feet and adapt their strategies throughout the match. The challenge of balancing between collecting Motes, summoning the Primeval, and defending against Invaders adds a dynamic layer of strategy that makes every match feel different. Gambit is not only about fast reflexes and aiming—it’s about teamwork, communication, and making the right decisions at the right time. Whether you’re coordinating with your team to clear out enemies or responding to an Invader’s threat, every action you take has a direct impact on the outcome of the match.

Additionally, the rewards for completing Gambit matches are substantial. Players can earn powerful gear, Gambit-specific weapons, and other coveted loot for participating in the mode. The rotating reward pools ensure that there’s always something to work toward, whether it’s unlocking new Gambit-specific weapons, improving your gear, or completing seasonal objectives. The thrill of the competition, the strategic depth, and the satisfying sense of progression make Gambit a mode worth trying for any Destiny 2 player looking for something beyond traditional PvE or PvP content.

Conclusion

Gambit is one of the most unique modes in Destiny 2, offering an experience that blends the cooperative nature of PvE with the intensity of PvP. Whether you’re battling AI enemies, collecting Motes, or defending against Invaders, Gambit provides a dynamic and strategic gameplay experience. For those looking to test their skills in both combat and teamwork, Gambit is an activity worth diving into. So, gather your fireteam, fine-tune your strategies, and prepare to face off in the ever-evolving world of Gambit.


Home

Tarkov Carry Service: How It Works and What to Expect

Introduction

A Tarkov carry service means teaming up with an experienced player who leads you through a raid to help you finish specific tasks. You might book a carry for quest items, quick level gains, or loot runs. Using a carry service lets you skip trial‑and‑error attempts, repeat map runs, and long waits for rare items. Instead, you work with someone who knows spawn points, extraction routes, and boss locations.

This saves you hours you would otherwise spend learning maps and grinding tasks. In addition to cutting down playtime, a carry run can teach you tactics, gear choices, and route planning by letting you observe an expert at work. Throughout this article, you will learn how a carry service works from booking to follow‑up, what you need to prepare, and what happens during each stage of the run. You’ll see how clear communication, goal setting, and a solid plan make your session smooth and efficient. By the end, you’ll know exactly what to expect when you book a Tarkov carry service and how to get the biggest benefit from each run.

What a Carry Service Covers

A carry service can cover quests, level boosts, and loot‑only sessions. For quest help, the runner focuses on finding required items or defeating specific enemies that count toward your mission. They handle the toughest parts, like boss fights or rare item spawns, while you watch tactics or stay safe at a fixed spot. After each objective, progress updates in your game, and the runner moves on to the next target until the quest completes.

For level boosts, the operator aims for high‑experience actions: scav waves, player kills, or repeatable tasks. They chart the fastest path across the map to hit XP hotspots. At session’s end, you see a jump in your experience bar without the usual dozens of solo runs. Loot‑only runs skip combat encounters. The runner hits known high‑value loot areas, grabs items, and extracts quickly. All collected gear goes straight into your secure container. By focusing on one goal per session, carry services keep you on track and save you from time‑wasting detours.

Booking Your Session

Start by sending a clear request that lists your goal, map, and preferred time. Include details like quest name or item count if you need mission help, target experience percentage for a level run, or types of loot you want. Next, pick a time slot that matches your schedule and the operator’s availability. Many teams offer an online calendar with open slots, while others ask for a direct message in chat.

Once you confirm a slot, the operator sends meeting details: spawn location, communication channel (in‑game text or voice chat), and any special gear requirements. Before the raid, prepare your loadout based on the operator’s notes—for example, bring a certain ammo type or minimal gear if the operator supplies weapons. Double‑check your account access so you can join the runner’s squad or meet at spawn without login issues. A clear booking process sets expectations for both sides, cuts down on lobby time, and helps the session start right on schedule.

Meeting and Spawn Details

Before you load into the raid, you need clear directions for meeting the runner. Most operators share a brief outline in text or voice chat. This outline covers the exact spawn point, squad invite or invite code, and the voice channel link if you use Discord or Teamspeak. You should check your game settings to allow squad invites and confirm your mic works if you plan to use voice. If you prefer text only, let the operator know so they can send in‑game messages.

At spawn, join the runner’s group immediately. If you miss the invite window, use the agreed backup plan—either meet at a fixed map location or wait in a safe spot near the spawn. Some operators set a short timer (for example, two minutes) before they start moving; be ready so you don’t hold up the run. Make sure your gear matches any requirements the operator listed. For example, if they ask you to bring medical supplies only, leave heavy weapons at the stash to avoid slowed movement.

Key points to confirm before the run:

  • Spawn location: Map name and exact spawn zone.
  • Squad invite: How you’ll get added (in‑game invite or code).
  • Communication link: Text channel name or voice server address.
  • Gear notes: Any items you must bring or leave behind.
  • Backup plan: Steps if you miss the initial invite.

Having these details in writing prevents confusion at the start and keeps the run on schedule. A smooth entry into the raid saves time and avoids forced reruns due to missed spawns or setup delays.

Live Raid Workflow

During the raid, the runner follows a set plan to hit your objectives. You either move with them or stay at a safe spot while they clear threats and gather items. Communication stays active so you know when to load, when to move, and when extraction is near. Below is a table showing the main stages of a carry run, what happens at each stage, and your role:

StageDescriptionYour Role
Initial SpawnRunner checks map markers and confirms spawn accuracyJoin squad or move to safe spot
Pathing to TargetsRunner follows the shortest route to your objectivesFollow or observe silently
Threat ClearanceRunner engages scavs, players, or bosses as neededStay hidden or provide cover fire if asked
Objective CheckRunner picks up items or defeats targetsConfirm progress via chat/voice
Extraction PrepRunner moves toward the agreed extraction pointLoad equipment and ready for exit
ExtractionRunner exits the raid, ending the sessionWatch for runner signal and extract

Each stage flows into the next with minimal downtime. The runner keeps you informed of major moves, such as a boss fight ahead or a hidden cache found. You don’t need to handle enemy combat unless you choose to; your main job is to stay in position and monitor progress. At every stage, clear communication helps you track what the runner is doing and prepares you for extraction.

Extraction and Delivery

Extraction marks the end of the live run and the moment you receive your rewards. The runner reaches the chosen exit point—such as a gate, shack, or van—and ends the raid. At that moment, all collected loot, quest items, or earned experience gets recorded in your stash or your profile. Operators often pause for a final check to confirm you received everything you requested.

If the extraction happens early due to a quick run or boss kill, the runner may offer to loop in for extra pickups or start a fresh run, depending on your agreement. If the raid takes longer than expected—perhaps due to heavy resistance or missing spawns—the operator might offer a partial retry or a time buffer if you booked enough slot time. Always review the session’s end rules before booking.

After extraction, you should verify that:

  • Quest progress updated correctly in your journal.
  • Loot items are in your secure container or on your character.
  • Experience gain matches the target percentage if you booked a level run.
  • Extra time or retry terms apply if the run ended early or late.

Clear end‑of‑run steps keep you from missing items or progress. A reliable operator confirms delivery and answers any final questions before wrapping up. This handoff completes the carry service and ensures you get the full benefit of the session.

Post‑Raid Follow‑Up

A good carry service does more than drop off loot. Many operators offer a short debrief where you can ask questions about route choices, gear swaps, or combat decisions you observed. This debrief might happen in voice chat for five to ten minutes or via text summary with key points. Some runners share screenshots showing map markers or gear setups they used. These follow‑up notes become a quick reference you can review before your next solo raid.

Operators also provide a contact channel for any issues that pop up after the session. If you notice a missing item or a quest didn’t update, you can send a message to resolve it. Many teams guarantee support for a set time—often 24 hours—after your run. This safety net ensures that glitches or misunderstandings get fixed without needing a whole new booking.

Common follow‑up features:

  • Live Q&A on tactics and map routes
  • Written summary with checkpoints and tips
  • Screenshots or route diagrams for future reference
  • Post‑run support window for issue reports

Taking advantage of post‑raid support turns a carry run into a learning step. You gain not only the items or experience you paid for, but also practical insights that speed up your solo runs in the future.

Conclusion

A Tarkov carry service guides you through raids with focused efficiency, saving you hours of solo grinding and increasing your success on quests, levels, and loot runs. By understanding each stage—from booking and spawn to live workflow, extraction, and follow‑up—you can set clear goals and prepare properly. Factors such as map choice, server traffic, operator experience, and your own readiness all shape how fast and smooth the session will be. Use the tips provided to communicate clearly, join on time, and track progress without distraction.

After extraction, review the debrief notes and apply learned tactics to your next solo missions. With careful planning and active participation, a carry service becomes more than a shortcut—it becomes a hands‑on tutorial that accelerates your Tarkov skills. Whether you aim to complete a tough quest, bump up your trader levels, or stock your stash with high‑value items, a well‑run carry session offers both immediate results and lasting lessons you can carry into every future raid.

AK-74M Vs M4A1 in Escape From Tarkov – Patch Comparison

When it comes to choosing between the AK-74M and M4A1 in Escape From Tarkov, understanding their strengths can greatly impact your gameplay.

The AK-74M offers formidable damage, especially in close quarters, while the M4A1 boasts low recoil for better sustained fire. Each weapon suits different combat styles, but recent patch changes have added new dynamics to their performance. So, which rifle aligns best with your approach? Let’s explore the details further.

Key Takeaways

  • Recent patch changes improved the AK-74M’s effectiveness in close-quarters combat, enhancing its damage output.
  • The M4A1 received a slight recoil reduction, enhancing its sustained fire accuracy for better performance.
  • The AK-74M delivers impressive damage at longer ranges but can be challenging to control due to recoil.
  • The M4A1’s modular design allows for extensive customization, making it adaptable to various playstyles and scenarios.
  • Choosing between the two depends on whether you prefer raw stopping power (AK-74M) or versatility and ease of use (M4A1).

Overview of the AK-74M

When you consider modern military rifles, the AK-74M stands out as a significant evolution of the classic AK-47 design.

One of the AK-74M advantages is its lightweight construction, which enhances maneuverability during combat. It also features a smaller caliber, reducing recoil and allowing for more accurate follow-up shots.

However, the AK-74M isn’t without its drawbacks. One of the AK-74M disadvantages is its effective range, which can be less than that of some competing rifles, limiting its versatility in long-range scenarios.

Additionally, while the rifle’s reliability is well-regarded, its complexity can lead to maintenance challenges in certain environments.

Overview of the M4A1

The M4A1 has become a staple in modern military arsenals, often compared to its counterparts like the AK-74M. One of its standout features is the variety of M4A1 customization options, allowing you to tailor the weapon to your playstyle.

Here are three key aspects you should know:

  1. Modular Design: The M4A1’s modularity lets you easily swap out parts, enhancing versatility.
  2. Accessory Compatibility: You can attach various optics, foregrips, and suppressors to improve your performance.
  3. M4A1 Recoil Control: Its design offers better recoil management, making it easier to maintain accuracy during rapid fire.

With these features, the M4A1 remains a popular choice for players seeking adaptability and precision in Escape From Tarkov.

Performance Comparison

While both the AK-74M and M4A1 excel in different environments, their performance can greatly impact your gameplay.

The AK-74M offers impressive damage output, especially at longer ranges, making it a solid choice for players who prefer precision shots. However, you’ll find its recoil control can be a bit challenging, requiring practice to master.

On the other hand, the M4A1 shines with its manageable recoil, allowing you to maintain accuracy during sustained fire. Its damage output is slightly lower than the AK-74M, but the trade-off often leads to quicker follow-up shots in close to mid-range encounters.

Ultimately, your choice depends on your playstyle—whether you value raw power or ease of handling.

Recent Patch Changes

Recent updates to the game have introduced notable changes to both the AK-74M and M4A1, impacting their performance and overall gameplay dynamics.

These patch effects are essential for weapon balancing, making it necessary for you to stay informed. Here are the key changes:

  1. Recoil Adjustments: The M4A1 now has slightly decreased recoil, allowing for more accurate sustained fire.
  2. Damage Output: The AK-74M’s damage has been fine-tuned, giving it a better edge in close-quarters combat.
  3. Rate of Fire: The M4A1’s rate of fire has been optimized, enabling quicker follow-up shots compared to the AK-74M.

These changes can greatly influence your strategy, so be sure to adapt your playstyle accordingly!

Choosing the Right Weapon for Your Playstyle

How can you determine which weapon suits your playstyle best? Start by evaluating your playstyle preferences.

If you favor close-quarters combat, the AK-74M offers powerful stopping power, while the M4A1 excels in versatility and accuracy at various ranges.

Consider your comfort with weapon handling; the M4A1 generally has a lighter feel and better ergonomics, making it easier to maneuver in tight spaces.

On the other hand, the AK-74M’s reliability and durability can be advantageous in prolonged engagements.

Experiment with both weapons in different scenarios to see which one aligns with your tactics.

Ultimately, your choice will depend on how well each weapon complements your unique approach to combat in Escape From Tarkov.

Conclusion

In the end, choosing between the AK-74M and M4A1 really comes down to your playstyle. If you prefer strong damage at range and close-quarters power, the AK-74M’s recent upgrades might suit you best.

On the other hand, if you value customization and better handling with reduced recoil, the M4A1 is the way to go. Consider how you like to engage in battles, and pick the weapon that complements your strategy in Escape From Tarkov.

Secrets of Modding Weapons for Maximum Efficiency in Escape From Tarkov

In Escape From Tarkov, mastering weapon modding can be a game-changer. You’ll find that understanding each weapon’s strengths and weaknesses allows you to tailor attachments for your specific playstyle.

Whether you’re going for stealth or aggression, the right mods can elevate your performance considerably. But what’s the secret to balancing recoil control and accuracy? Let’s explore the essentials that can give you the edge in any firefight.

Key Takeaways

  • Understand your playstyle: Choose attachments that complement your approach, whether stealthy or aggressive, to maximize weapon efficiency.
  • Balance recoil and accuracy: Select muzzle devices and grips that manage recoil while improving bullet stability to enhance combat performance.
  • Experiment with custom builds: Test various combinations of barrels, optics, and grips to find the optimal setup for your preferred engagement distance and maneuverability.
  • Optimize ammunition choice: Tailor your ammo type to maximize damage and penetration, ensuring it aligns with your weapon’s capabilities and your tactical needs.
  • Maintain weapon durability: Regular cleaning and lubrication of your firearm, along with proper storage, ensures consistent performance during raids.

Understanding the Basics of Weapon Modding

When you engage yourself in weapon modding in Escape From Tarkov, you’ll quickly realize it’s essential for enhancing your performance. Understanding the modding mechanics is your first step.

Each weapon has unique characteristics, and knowing how to manipulate these can give you the edge in combat. You’ll need to pay attention to attachment compatibility, as not every attachment works with every weapon. This compatibility can affect your weapon’s recoil, accuracy, and handling.

Experimenting with different combinations helps you find the ideal setup for your playstyle. As you learn the nuances of modding, you’ll start to appreciate how even small tweaks can greatly impact your effectiveness in the field.

Immerse yourself, and let the customization journey begin!

Essential Attachments for Different Playstyles

What do you need to contemplate when choosing attachments for your preferred playstyle in Escape From Tarkov? First, think about your combat approach. If you favor stealth, consider attachments that enhance suppressor benefits. A suppressor not only reduces noise but also minimizes recoil, allowing you to stay hidden longer.

For aggressive playstyles, you might prioritize attachments that improve fire rate and control.

Next, don’t forget about ammo types; different rounds can drastically affect your weapon’s performance. For example, using high-penetration ammo can be a game-changer in armored encounters.

Tailor your attachments to complement your chosen ammo, ensuring you maximize damage while maintaining your desired playstyle. Balancing these elements will lead to a more effective and enjoyable experience in Tarkov.

Balancing Accuracy and Recoil Control

Choosing the right attachments for your preferred playstyle naturally leads to reflections on accuracy and recoil control. You need to find a balance between managing recoil patterns and achieving high accuracy metrics.

Start by selecting a muzzle device that minimizes recoil while enhancing bullet stability. Opt for grips that improve your handling and reduce vertical and horizontal recoil. Remember, heavier barrels can increase accuracy but might affect mobility.

Test different combinations to see how they impact your aim and recoil during sustained fire. Use the shooting range to evaluate your weapon’s performance and tweak attachments based on your shooting style.

Ultimately, a well-modded weapon should allow you to maintain accuracy while keeping recoil manageable for those intense firefights in Tarkov.

Optimizing Weapon Durability and Maintenance

While you may focus on enhancing your weapon’s performance, neglecting its durability and maintenance can lead to costly failures in the heat of battle.

To guarantee your weapon stays in top shape, prioritize regular weapon care. Start by cleaning your firearm after every raid to remove dirt and residue that could affect functionality. Use appropriate maintenance techniques, like lubricating moving parts and checking for wear and tear on components.

Pay attention to the condition of your magazines, as they can greatly impact reliability. Additionally, store your weapon in a secure location to prevent environmental damage.

Experimenting With Custom Builds for Unique Advantages

When you plunge into the world of custom builds in Escape From Tarkov, you’ll discover endless possibilities that can give you a unique edge in combat.

Experimenting with custom loadouts allows you to tailor your weapon for specific scenarios, enhancing your tactical advantages.

Here are four key areas to focus on:

  1. Barrel Length – Opt for shorter barrels for better maneuverability in tight spaces.
  2. Optics – Choose sights that suit your engagement distance, whether it’s close-quarters or long-range.
  3. Grip – Select grips that reduce recoil and improve handling for faster follow-up shots.
  4. Ammunition – Experiment with different ammo types to maximize damage and penetration based on your targets.

Conclusion

Mastering weapon modding in Escape From Tarkov can take your gameplay to the next level. By understanding the essentials and experimenting with different attachments, you can tailor your weapons to fit your unique playstyle.

Balancing accuracy, recoil control, and durability guarantees your gear remains effective in various combat scenarios. So, plunge into the world of customization, try out new builds, and discover the secrets that’ll give you the edge over your opponents in Tarkov!

Where to Find the Best Loot on Reserve in Escape From Tarkov (2025)

If you’re looking to maximize your loot runs on the Reserve map in Escape From Tarkov, you’ll want to know the prime locations where high-tier gear is often found. The Black Bishop and King buildings are just the start, but there’s more to uncover.

Understanding the layout and hidden spots can really elevate your scavenging game. Let’s explore the strategies that can help you survive while uncovering these valuable treasures.

Key Takeaways

  • Focus on high-tier loot locations like the Black Bishop building and King building for valuable containers.
  • Explore the railway station for a high concentration of top-tier gear availability.
  • Look for marked areas on the map to increase your chances of finding rare items.
  • Don’t overlook hidden stash locations, as they can yield significant rewards and valuable crafting materials.
  • Always plan your escape routes and manage noise to improve survival chances while looting.

Key Locations for High-Tier Loot

When you drop into Reserve, knowing where to find high-tier loot can make all the difference in your survival.
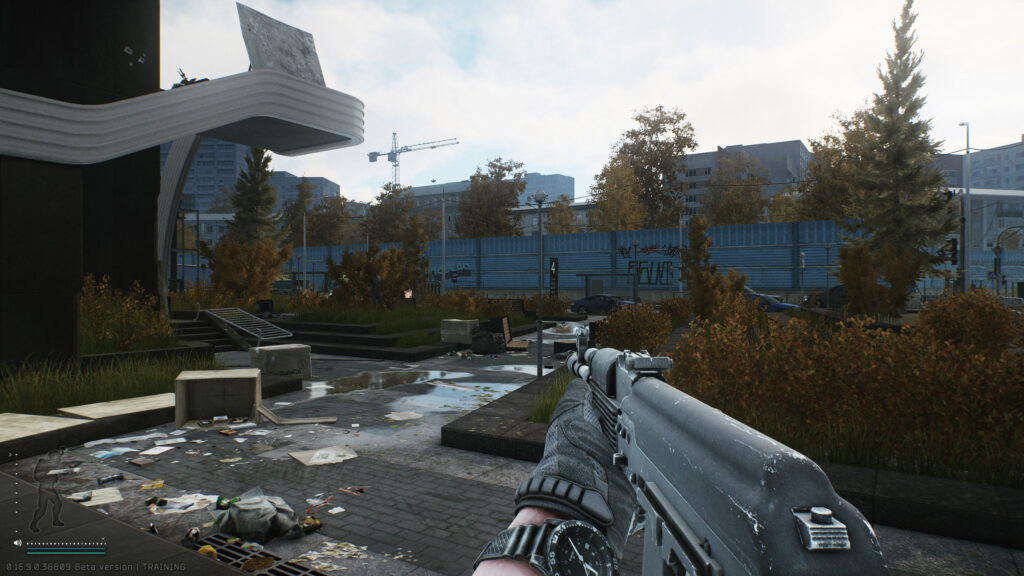
Focus on key locations like the Black Bishop building and the King building, both of which house high value containers. These areas often have lucrative loot spawns, so be prepared to engage or evade other players.

Don’t overlook the railway station; it’s another hotspot for high-tier gear.

Check the marked areas for more chances to snag valuable items, and always keep an eye out for hidden stash locations.

Best Strategies for Scavenging

Although Reserve is packed with potential dangers, employing effective scavenging strategies can greatly enhance your chances of survival and loot collection. Adopting a scavenger mindset is essential; stay alert and always be aware of your surroundings. Use effective looting techniques by prioritizing high-value areas and being quick with your searches. Here’s a quick reference table to help you:

StrategyDescription
Stay SilentMove cautiously to avoid detection.
Prioritize LocationsFocus on high-tier loot spots first.
Manage InventoryKeep your bag light for quick escapes.
Use CoverUtilize terrain to stay hidden.
Plan Your ExitsAlways have an escape route in mind.

Understanding the Map Layout

Maneuvering the complex terrain of Reserve can be the difference between a successful raid and an early exit. To make the most of your time in this map, focus on map navigation and terrain awareness.

Familiarize yourself with key areas like the train yard, the bunker, and the various buildings, as each location has its own loot potential. Use the layout to your advantage by planning your route to avoid high-traffic zones where enemies are likely lurking.
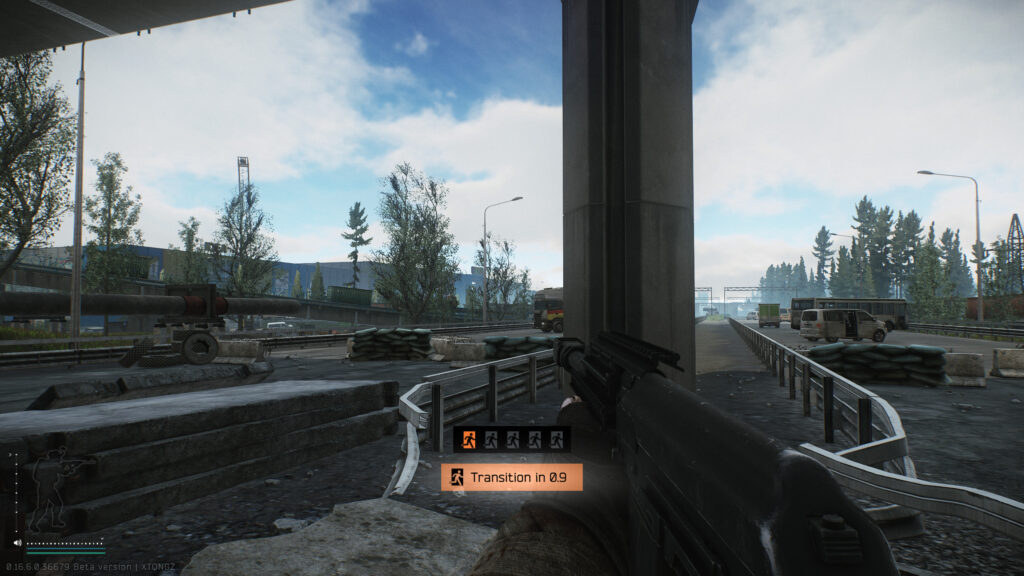
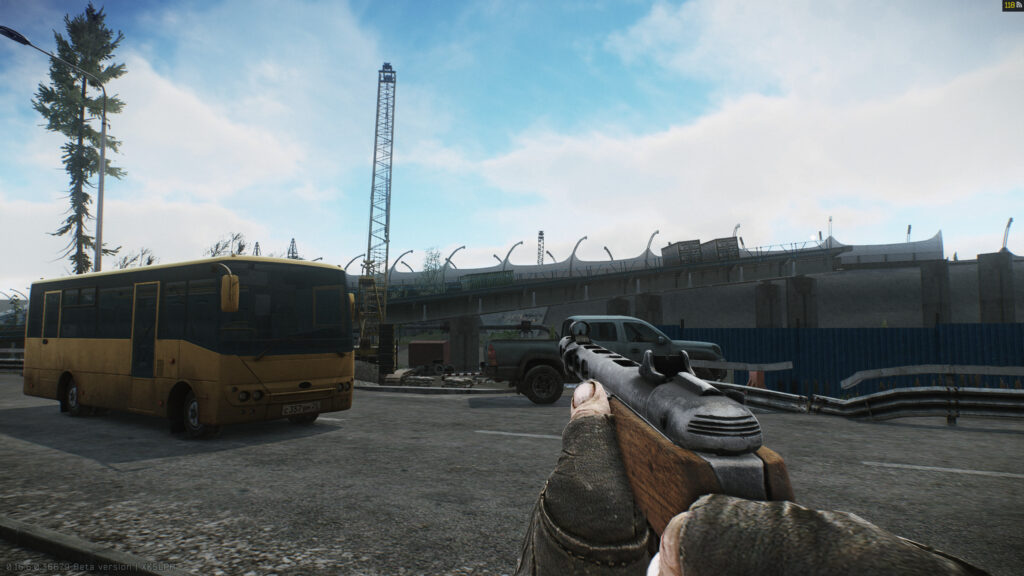
Keep an eye on the elevation changes, as they can provide cover and vantage points. Knowing where you’re going and understanding the surrounding environment will help you stay one step ahead of both scavengers and PMCs.

Stay sharp and adapt your strategy as needed.

Hidden Secrets and Rare Finds

While exploring Reserve, you’ll uncover hidden secrets and rare finds that can greatly enhance your gear. Keep an eye out for hidden stashes, as they often contain valuable items that can turn the tide in battle.

These treasures not only boost your inventory but can also include rare collectibles that you mightn’t find elsewhere.

Here are some notable items to look for:

  • Military cables
  • LEDX medical tools
  • Graphics cards
  • Rare weapon parts
  • Unique currency notes

These items not only enhance your gameplay but can also fetch a high price on the flea market.

Probe deep into the map, and you’ll be rewarded with loot that’s worth the effort. Happy hunting!

Tips for Surviving While Looting

Finding valuable loot on Reserve can be exhilarating, but it’s important to stay sharp and vigilant. Use effective survival techniques to maximize your chances of making it out alive.

Always scout your surroundings before diving into any looting spots. This’ll help you identify potential threats and plan your approach.

When using looting strategies, prioritize high-value areas, but avoid rushing in; patience pays off. Stay aware of your noise levels—crouch-walking can minimize sound and keep you stealthy.

Don’t forget to keep an escape route in mind. If things heat up, you’ll want to retreat quickly.

Finally, always have a reliable weapon ready; you never know when you’ll need to defend your hard-earned loot.

Conclusion

In Escape From Tarkov’s Reserve map, you’ve got plenty of opportunities for high-tier loot if you know where to look. By focusing on key locations like the Black Bishop and King buildings, and utilizing marked areas and hidden stashes, you can maximize your loot runs.

Remember to stay aware of your surroundings and use effective strategies to survive while scavenging. With these tips, you’ll be well on your way to securing valuable gear in no time!