Author: Amanda Barrett

Amanda Barret is an experienced gaming journalist with over five years of experience in covering the ever-evolving gaming industry. She has been featured on major game sites, magazines and blogs such as Kotaku, Polygon, IGN, Joystiq and many more. Amanda is a passionate writer who loves to explore new trends and dive deep into in-depth analysis of groundbreaking games. With a particular affinity for indie titles, she often takes readers through an immersive journey that explores the history behind some of the most beloved titles.

Escape From Tarkov Ammo Guide: Understanding Calibers, Penetration, and Damage Values

In Escape From Tarkov, knowing your ammunition is just as important as knowing your weapon. Every bullet type behaves differently, with unique penetration, damage, and armor effectiveness values. Using the wrong ammo can mean losing fights you should have won—while using the right one can help you drop enemies in a single burst. In 2025, with updated ballistics and armor systems, understanding ammo mechanics has never been more crucial.

This guide explains Tarkov’s ammo types, how penetration and damage interact, and which rounds dominate in the current wipe.

Caliber Basics

Each weapon in Tarkov uses a specific caliber, from the light 9x19mm pistol rounds to the devastating 7.62x51mm NATO rifle ammunition. Larger calibers tend to offer higher penetration and damage but come with heavier recoil. Choosing the right caliber depends on your weapon type, playstyle, and the armor you expect to face.
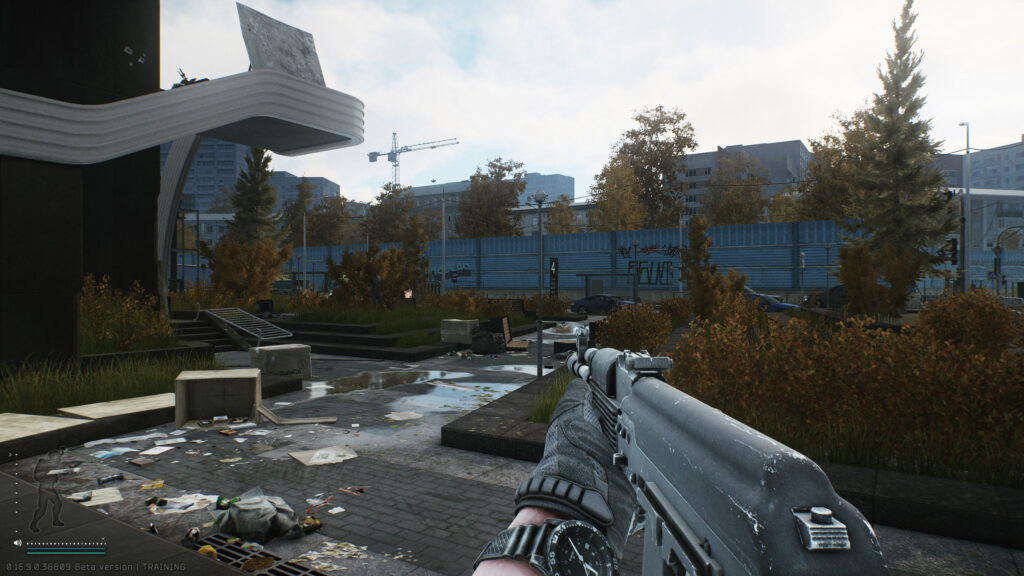
Common beginner calibers like 5.45x39mm and 7.62x39mm strike a balance between control and power, making them perfect for early- and mid-wipe combat.

Penetration vs. Damage

Ammo in Tarkov works on two key stats: penetration power and damage value. Penetration determines whether your bullet passes through armor, while damage affects how much health the target loses upon impact. High-damage, low-penetration rounds excel against unarmored enemies, but fall short when facing geared players.

Veterans often favor high-penetration rounds, as surviving armor-clad encounters matters more than dropping scavs quickly.

Ammo Types and Effectiveness

Different ammo types cater to specific purposes. For instance, AP (armor-piercing) rounds like 7.62×51 M61 shred through heavy armor, while hollow points like 9×19 RIP cause massive flesh damage but fail against even basic protection. Mixing ammo types strategically can help balance cost and performance.
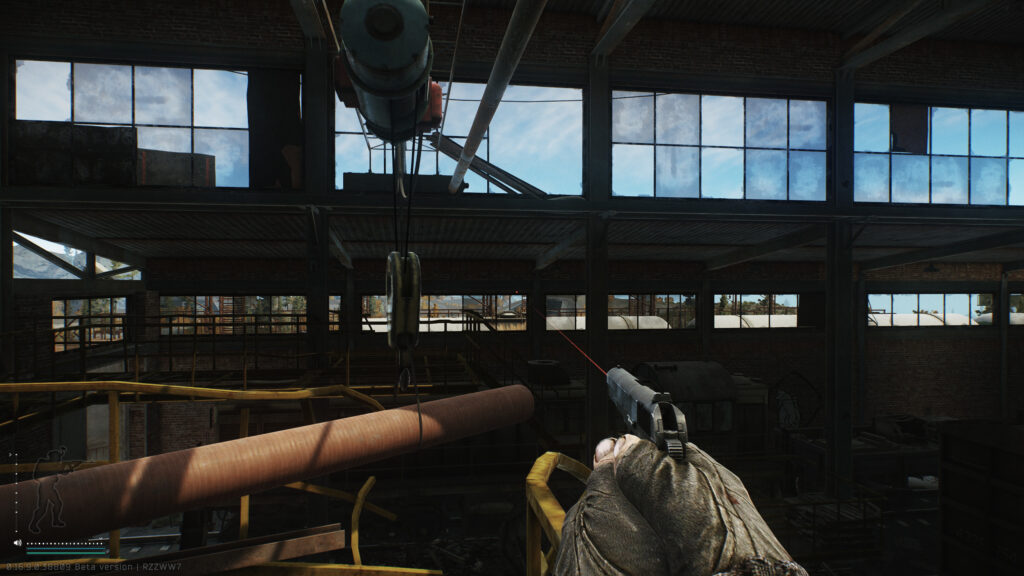
Understanding which rounds dominate your chosen caliber helps optimize every firefight.

Best Rounds per Caliber in 2025

The table below summarizes the best-performing ammunition types for their calibers in the current wipe:

CaliberAmmo TypeKey Strength
5.45x39mmBSHigh penetration, balanced damage
7.62x39mmBPExcellent against mid-tier armor
5.56x45mm NATOM855A1Strong armor penetration, reliable damage
7.62x51mmM61Top-tier penetration for endgame PvP
9x19mmAP 6.3Viable pistol ammo with armor-piercing ability

Testing and Practice

The best way to learn ammo performance is through testing. Offline raids let players experiment with different rounds against armored targets, giving a feel for how each behaves. Keeping a simple reference sheet or using in-game charts saves time when gearing up for live raids.

Practical experience quickly builds intuition about which ammo to load in every situation.
Conclusion

Mastering Tarkov’s ammo system turns good players into deadly ones. Understanding how calibers, penetration, and damage interact ensures you’re always prepared for the fight ahead. In 2025, as gear and armor evolve, knowledge remains your strongest weapon. Choose wisely, aim carefully, and let your bullets do the talking.
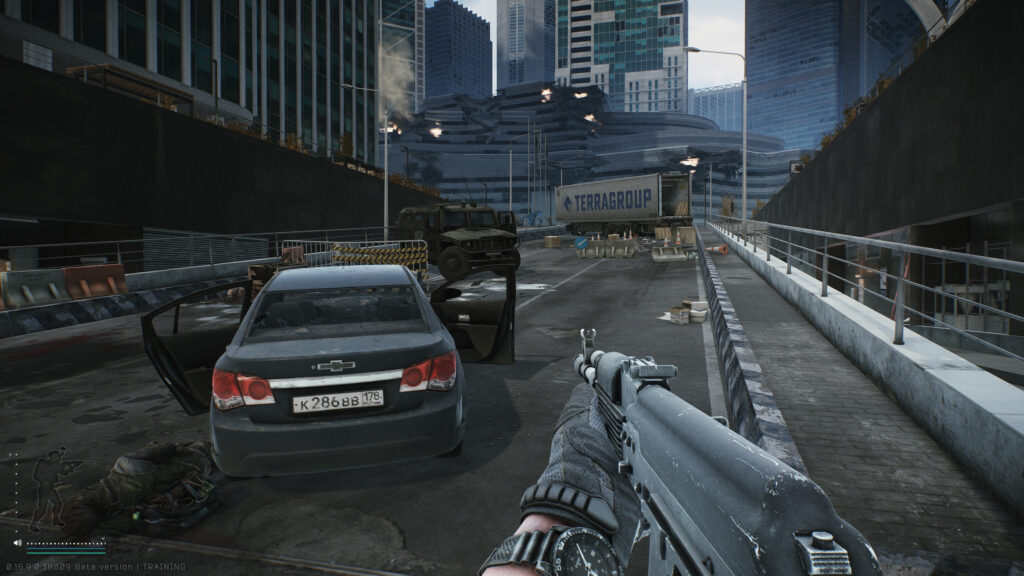
In Tarkov, knowing your ammo isn’t optional—it’s survival.

The Best Tactics for Surviving High-Traffic Areas in Escape From Tarkov

High-traffic zones in Escape From Tarkov are where risk meets reward. These hotspots—loot rooms, extractions, and chokepoints—offer the best loot but attract the deadliest players. Whether it’s Dorms on Customs or the Resort on Shoreline, entering these areas without a plan almost guarantees death. Yet, with the right tactics, you can outplay the chaos and walk out richer than ever.

This guide details proven strategies for surviving high-traffic areas, from map awareness to engagement control, helping you turn danger zones into opportunities in 2025.

Understanding High-Traffic Zones

Every map in Tarkov has locations that attract players due to loot density or strategic positioning. These include Customs Dorms, Reserve’s Black Knight building, Labs’ Server Room, and Interchange’s Techlight store. These zones are lucrative but dangerous—multiple entry points, poor visibility, and constant ambush threats make them unforgiving for unprepared players.

Before entering, always evaluate whether the potential reward outweighs the risk. Patience often profits more than recklessness.

Timing Is Everything

The first five minutes of a raid are the most volatile. Many players rush to popular hotspots hoping for uncontested loot, only to die early. Smart players wait out the initial chaos, approaching high-traffic areas later when PvP intensity declines. This “late-entry” strategy allows you to loot leftover valuables safely or ambush distracted players mid-fight.

Sound discipline and patience are your best allies—wait, listen, and strike when the map quiets down.

Use Sound and Vision to Your Advantage

In high-traffic areas, sound is both weapon and weakness. Avoid sprinting, and use crouched movement to stay silent. Pay attention to auditory cues like footsteps, reloads, or door creaks—they reveal enemy positions before visuals do. Use shadows, reflections, and lighting to conceal your movement, especially near staircases and open corridors.
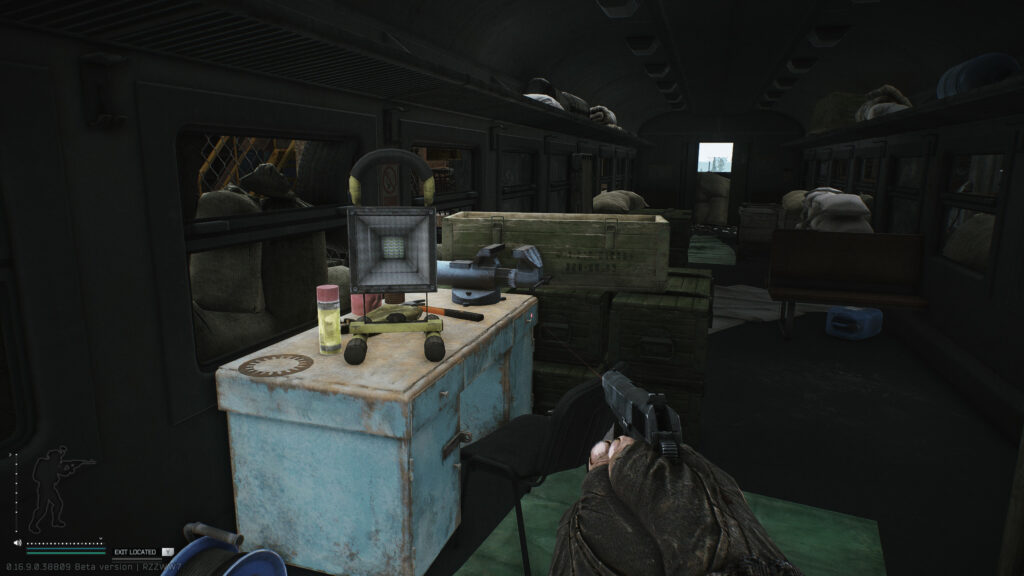
Controlling audio and visibility gives you an invisible advantage that most players underestimate.

Engagement and Escape Strategy

Never commit to fights you don’t need to win. If your goal is loot, focus on extraction rather than domination. When forced into combat, hold tight angles and use cover effectively. After engagements, relocate immediately—most deaths occur when players loot without repositioning. Always know your nearest escape route and plan your extraction before taking risks.

Surviving is victory; extraction is success.

Hotspot Overview and Survival Tips

The table below summarizes common high-traffic areas and tactics to survive them:

MapHotspotMain RiskSurvival Tip
CustomsDormsAmbushes, sound trapsFlank via Construction after 5 min
InterchangeTechlight StoreSnipers, stairwell crossfireUse underground paths for approach
ReserveBlack Knight BuildingGrenade spam, rooftop firePush during mid-raid calm
LabsServer RoomRaiders, PvP squadsActivate extraction before looting

Team Coordination in Hot Zones

Communication and role division make a huge difference. Assign one player as a scout and another as cover fire. Avoid stacking in hallways—spread out to control multiple sightlines. When entering rooms, clear angles sequentially and call out targets clearly. Organized teams often dismantle uncoordinated squads simply through structured movement.

In Tarkov’s chaos, disciplined teamwork outshines raw aim every time.

Conclusion

High-traffic areas are Tarkov’s greatest challenge—and greatest reward. Surviving them demands awareness, discipline, and adaptability. The best players know when to fight, when to flee, and when to wait. By mastering timing, sound control, and extraction planning, you can turn even the deadliest zones into consistent profit runs.

Remember: in Tarkov, the smartest survivor is the richest one.

Understanding Tarkov’s Stash Management: How to Organize, Optimize, and Profit

Escape From Tarkov is a game of chaos and order—raids bring chaos, and your stash demands order. Managing your stash efficiently is one of the most overlooked skills in Tarkov, yet it directly impacts your profit, preparation time, and overall gameplay flow. An organized stash means faster raid prep, better decision-making, and more rubles earned long-term.

This guide explains how to organize your stash effectively, optimize space usage, and even turn your stored items into profit without wasting valuable time or resources.

Why Stash Management Matters

Every minute spent sorting gear is a minute not spent earning money in raids. Poor organization leads to confusion, clutter, and missed opportunities to sell or use valuable items. Efficient stash management ensures you always know what you have, what to bring, and what to sell. It keeps your economy flowing smoothly between raids and reduces downtime dramatically.

Good organization also minimizes mistakes—like accidentally selling a quest item or bringing the wrong ammo into battle.

Creating a Stash Organization System

Divide your stash into logical sections: one for armor and helmets, another for weapons, one for meds, and one for barter or crafting items. Use labeled containers such as Ammo Cases, Med Cases, and Weapon Cases whenever possible. Group similar items together to streamline searching and prevent confusion during high-pressure raid prep.

A structured stash not only looks clean but also gives you a mental map of your entire inventory—saving precious time between raids.

Optimizing Space and Efficiency

Space is your most limited resource in Tarkov. Always prioritize items by ruble-per-slot value. Dismantle large weapons and store only valuable attachments. Compress barter items into crafting resources once you have enough duplicates. Stack ammo efficiently and avoid hoarding outdated gear that you no longer use.

For higher-tier players, expanding stash size through edition upgrades or hideout improvements can significantly boost efficiency and reduce stress.

Turning Stash Management Into Profit

Your stash can be a money-making machine if managed correctly. Identify slow-moving inventory and sell it on the Flea Market before prices drop. Convert excess barter items into crafts or trades that yield higher value. Keep a running list of profitable items that sell quickly to avoid wasting slots on low-demand loot.

Efficient stash rotation ensures you always have liquid capital ready for new opportunities.

Organization Strategy Summary

The table below outlines an optimal stash management framework for consistent profits:

CategoryStorage MethodGoal
Weapons & ModsWeapon/Item CasesMaximize accessibility
Medical SuppliesMed Case or Tactical BagFast loadout prep
Barter ItemsMarked ContainersEasy sale and trade tracking
AmmoAmmo CasePrevent mix-ups mid-raid
High-Value LootSecure ContainersQuick access for Flea Market sales

Conclusion

Stash management is more than a convenience—it’s a competitive advantage. An optimized stash keeps you organized, improves focus, and boosts long-term profits. In 2025, when every second counts, knowing where everything is can be as important as your aim in combat. Stay tidy, stay efficient, and let your stash become your secret weapon.

In Tarkov, organization is survival—and profit follows discipline.

Escape From Tarkov Lighthouse Expansion Overview: New Challenges and Routes

The Lighthouse map has always stood out in Escape From Tarkov for its high-risk, high-reward gameplay. With the latest 2025 expansion, Lighthouse has evolved into a more complex and rewarding environment featuring new routes, enhanced AI patrols, and hidden stashes that redefine how players approach this coastal battleground. The update not only expands the playable area but also raises the skill ceiling for surviving its dangers.

This overview covers every major addition to the Lighthouse expansion, including new paths, environmental hazards, and advanced strategies to master the updated layout.

Expanded Playable Area and Landmarks

The most noticeable change in the Lighthouse expansion is the addition of several new zones, including the Naval Yard, Oil Depot, and Cliffside Settlement. Each area introduces unique risk-reward opportunities. The Naval Yard is packed with valuable industrial loot but patrolled by heavily armed Rogues, while the Cliffside Settlement offers a mix of tactical cover and sniper overwatch positions.

Environmental storytelling also plays a bigger role—burnt-out vehicles, collapsed tunnels, and flooded basements hint at Tarkov’s decaying infrastructure and new hidden loot opportunities.

New Routes and Movement Options

Players now have access to multiple alternative routes connecting key zones, reducing reliance on choke points near the Lighthouse bridge. The new tunnel network under the eastern cliffs allows stealthier approaches, though the confined space comes with ambush risks. Several previously closed gates are now open, adding dynamic rotation paths between the Rogues’ compound and the water treatment plant.

Knowing these alternate routes is vital for survival—many seasoned players are still adapting, making this the perfect time to learn and exploit them.

Rogue AI Overhaul and Combat Changes

Rogue behavior has been completely reworked. They now coordinate attacks, flank players, and even call reinforcements when outnumbered. Their weapon accuracy and grenade usage have improved significantly, making careless pushes a death sentence. Fortunately, players who manage to defeat them can now find new weapon mods, military electronics, and rare barter items exclusive to the Lighthouse zone.

This AI upgrade raises the stakes, transforming Lighthouse from a simple loot run into a high-level PvE challenge.

Dynamic Weather and Visibility Updates

The expansion introduces weather patterns unique to Lighthouse. Dense sea fog can roll in mid-raid, drastically reducing visibility while muffling sound. Meanwhile, coastal windstorms create unpredictable noise, masking footsteps and altering long-range combat. Players who adapt to these shifts gain a strategic edge in stealth and surprise engagements.

Environmental unpredictability is now part of the map’s core identity—mastering it is as important as combat itself.

Loot Redistribution and Hidden Caches

Loot balance has been adjusted to encourage exploration. High-value stashes have been moved deeper inland or hidden in environmental details such as collapsed trucks or half-sunken containers. A new type of cache, marked by faint blue lights, contains specialized Rogue-exclusive loot. Players willing to risk longer routes can find unique crafting materials unavailable elsewhere.

The table below highlights some of the most profitable new loot zones:

LocationLoot TypeRisk Level
Naval YardMilitary electronics, barter itemsHigh
Cliffside SettlementWeapons, medical lootMedium
Oil DepotFuel, crafting materialsHigh
Tunnel NetworkHidden stashes, ammoMedium

Extraction Changes and Strategy

Several new extraction points have been added, including “Cliffside Path” and “Naval Exit.” Some require special conditions like flare signals or Rogues’ cooperation, adding strategic layers to late-raid decision-making. Standard extractions like “Road to Military Base” remain reliable but are now more heavily contested by AI and players alike.

Flexibility and map knowledge are key—knowing multiple extraction routes can save your life when things go sideways.

Conclusion

The Lighthouse expansion marks a major leap forward for Tarkov’s map design, blending high-stakes PvE, dynamic weather, and evolving AI into a cohesive experience. The new zones reward exploration and mastery, offering endless replayability for both solo players and squads. In 2025, Lighthouse stands as one of Tarkov’s most challenging—and rewarding—locations for those bold enough to face its dangers.

Adapt, explore, and conquer the coast—because survival never looked this stunning.

The Hidden Routes That Let You Escape Tarkov Undetected

Escape from Tarkov isn’t just about combat; survival often depends on knowing the hidden routes and alternative paths that keep you safe from other players and AI.

While the obvious roads and checkpoints are heavily contested, hidden routes can allow you to move through maps unseen, collect loot quietly, and reach extraction points safely. These paths require intimate map knowledge, careful planning, and patience, but mastering them can turn an average player into an expert at disappearing before enemies even notice your presence.

Secret Alleyways and Side Paths

Many maps contain alleyways, service roads, and minor paths that are rarely used by other players. These paths can bypass high-traffic areas and reduce the chance of ambushes.

Using them effectively requires awareness of potential bottlenecks and AI patrols. Players must balance speed and stealth, choosing when to sprint, crouch, or crawl. Learning which alleyways are safe and which contain hidden threats is key to minimizing risk while maintaining momentum towards objectives and extraction points.

Underground Tunnels and Hidden Exits

Some maps offer tunnels, basements, or maintenance shafts that act as secret connectors between areas. These passages often provide complete concealment from snipers and patrols. Players need to be cautious, as these routes may have limited exits or contain traps, but they can serve as critical escape avenues when the main roads are contested.

Knowledge of these tunnels allows for creative rotations and the element of surprise during combat or while sneaking past stronger squads. Map Secret Route Type Extraction Advantage Customs Underground Sewer Bypasses Dorm Hotspots Interchange Service Elevator Shaft Avoids Main Mall Corridors Factory Roof Access & Catwalks High vantage point escape Woods Forest Stream Path Skirts Player Camps Shoreline Hidden Dockside Passage Evades Main Resort Clashes

Using Verticality to Evade Detection

Height differences provide another tool for undetected movement. Climbing onto rooftops, scaffolding, or hills can allow you to bypass busy streets and approach extraction points unseen.

Verticality also helps in spotting enemies ahead, adjusting routes dynamically, and taking the safest path to your destination. Players who integrate vertical movement into their hidden route strategies often escape far more efficiently than those sticking to ground-level paths.

Timing and Patience Are Critical

Even with knowledge of hidden routes, timing is crucial. Moving too quickly can alert AI or players, while waiting too long can reduce loot opportunities. Advanced Tarkov players learn the rhythm of the map: when enemies are likely to be distracted, when patrol patterns shift, and when it’s safest to move. Patience and timing combined with route knowledge allow for clean, undetected extractions and significantly increase survival rates.

Psychological Advantage

Using hidden routes not only protects you physically but also provides a psychological edge. Other players may assume the obvious path is safe, making them predictable.

By exploiting alternative routes, you can control engagements on your terms, set up ambushes, or escape confrontations entirely. This unpredictability keeps opponents off balance and reinforces your reputation as a savvy, hard-to-catch player.

Conclusion

Mastering hidden routes in Tarkov transforms how you approach survival. From alleyways and underground tunnels to elevated paths and overlooked passages, these routes allow players to evade detection, loot efficiently, and reach extractions safely.

Combining route knowledge with timing, patience, and map awareness provides a tactical advantage that goes beyond firepower. Players who embrace these strategies consistently escape encounters alive, making them some of the most dangerous and elusive figures on any map.

Tarkov Stealth Movement Tricks That Work Every Time

Stealth is one of the most important skills in Escape From Tarkov. Moving silently, avoiding detection, and understanding sound mechanics can dramatically increase your survival rate in raids. Many players focus too much on firepower, but strategic movement often determines who lives and who dies.

Mastering stealth requires a combination of sound awareness, tactical positioning, and timing. Small adjustments in walking speed, route choice, and body posture can make the difference between a clean extraction and an ambush.

Walking and Crouching Techniques

Walking and crouching reduce the noise you make and minimize visual detection. Beginners often run without considering sound, alerting both AI and enemy players. Controlled movement, especially when passing through high-traffic zones, is critical for remaining unnoticed.

Crouching in the right locations allows you to observe enemy movements without being seen. Combine crouching with cover usage to maintain safety while scouting loot or planning your route.

  • Walk slowly to reduce footstep noise
  • Crouch near cover to observe threats
  • Use diagonal movement to minimize exposure
  • Avoid running on metal surfaces unless necessary

Sound Awareness

Listening is as important as moving silently. Players must recognize footsteps, gunfire, and environmental sounds to anticipate enemy positions. Using headphones and adjusting game audio settings can significantly improve your awareness.

Sound also informs tactical decisions, such as whether to engage, hide, or flank. Knowing how your own actions generate sound, including weapon reloads and armor movement, helps avoid giving away your position.

Route Planning

Planning your route before entering high-risk areas ensures safer movement. Stick to less obvious paths, avoid open areas, and utilize natural cover. Beginners often make the mistake of following main paths, which increases encounters with both AI and hostile players.

Rotating through buildings, alleys, and terrain features reduces predictability and helps you remain unseen. Efficient route planning also allows you to reach loot and extraction points with minimal exposure.

Use of Terrain and Objects

Environmental awareness is crucial for stealth. Players can use shadows, crates, furniture, and terrain to break line-of-sight from enemies. High-level players manipulate terrain to create ambushes or slip past opponents unnoticed.

Proper use of objects also aids in noise masking. Walking near ambient noise sources like water or machinery can hide your footsteps, allowing for safer approaches or escapes.

Timing and Patience

Patience is a vital component of successful stealth. Rushing increases mistakes, noise, and detection probability. Waiting for the right moment to move, such as during gunfire or AI distraction, increases the likelihood of remaining undetected.

Experienced players know when to pause, observe, and move. Timing your movements around both AI and player activity maximizes efficiency and survival odds in Tarkov raids.

Conclusion

Mastering stealth in Tarkov requires walking, crouching, sound awareness, route planning, terrain usage, and patience. Combining these techniques allows you to navigate raids safely and avoid unnecessary confrontations.

Players who prioritize stealth gain a tactical advantage, conserve resources, and have higher survival rates, making stealth movement a cornerstone skill for successful Tarkov gameplay.

Tarkov Ammo Secrets: What the Pros Don’t Tell You

Ammunition in Escape From Tarkov is more than just a means to fire your weapon—it can determine the outcome of every raid. Choosing the right ammo type, understanding penetration mechanics, and knowing where to find the most effective rounds are critical for survival. Even players with the best weapons can be outmatched if their ammo selection is poor, making this knowledge a hidden advantage for savvy operators.

Professional players pay close attention to the ballistic properties of each round, including damage, penetration, fragmentation, and recoil. These factors affect both AI and player engagements, influencing whether a firefight will end quickly or drag into a dangerous struggle. By mastering ammo selection, you maximize damage output while minimizing wasted shots and unnecessary exposure.

Ammo Types and Their Applications

Different weapons in Tarkov require specific ammo types that vary in performance. For example, AP (armor-piercing) rounds excel against heavily armored opponents, while HP (hollow-point) rounds offer higher damage against unarmored targets. Selecting ammo should always consider both your loadout and the expected enemies on the map.

Ammo choice also influences recoil and weapon handling. Heavier rounds often increase weapon kick, affecting accuracy in rapid engagements. Lighter rounds may allow faster follow-up shots but reduce penetration. Pros balance these factors to maintain both survivability and lethality. Ammo Type Best Use Key Advantage 5.45×39 BP Against armored Scavs and PMC High penetration, moderate damage 7.62×51 M61 High-end rifles, boss fights Exceptional penetration, lethal to all targets 9×19 RIP Close-quarters, unarmored opponents High damage, fast incapacitation

Finding the Best Ammo

Ammo is scarce and highly contested in Tarkov, making efficient acquisition a key skill. Certain maps and locations, like Interchange tech stores, Reserve bunkers, and custom trader purchases, are consistent sources for rare rounds. Players also need to consider cost-effectiveness, balancing high-performance ammo with financial resources.

Trading knowledge is another secret. Some ammo types are overpriced on the flea market but can be obtained cheaply from vendors if quests or reputation levels are leveraged. Operators who understand market dynamics can acquire top-tier rounds without depleting their funds, ensuring readiness for future raids.

Ammo and Engagement Strategy

Choosing ammo impacts how you approach combat. Armor-piercing rounds enable headshot-focused tactics, while high-damage rounds may encourage body-target strategies. Understanding the interaction between ammo and enemy armor ensures that engagements are efficient, reducing time exposed to return fire.

Pro players often carry multiple ammo types for flexibility. Switching between rounds based on enemy composition, range, and cover conditions allows adaptation mid-fight, giving a significant tactical advantage. Ammo selection becomes a key part of the decision-making process in every raid.

Optimizing Ammo Loadouts

Managing your ammo loadout is crucial for raid success. Carrying too much of a single type can leave you vulnerable if situations change, while spreading ammo across types ensures versatility but limits quantity per round. Pros strike a balance that fits their playstyle and raid objectives.

High-value ammo should also be protected carefully. Storing rounds in secure containers or compartmentalized backpacks reduces loss if a raid ends abruptly. Every round saved could make the difference in your next encounter, highlighting the strategic importance of ammo beyond just firing your weapon. Weapon Recommended Ammo Optimal Engagement Range AK-74N 5.45×39 BP 0-200m RSASS 7.62×51 M61 100-400m MP5 9×19 RIP 0-50m

Conclusion

Mastering ammo in Tarkov is a cornerstone of survival. By understanding types, sourcing strategies, tactical applications, and optimal loadouts, you gain a significant edge over both AI and human opponents. Efficient ammo management enhances lethality while reducing unnecessary risk, turning even high-pressure raids into calculated, winnable encounters.

Operators who study and adapt their ammo choices consistently outperform others. This hidden layer of Tarkov’s gameplay separates skilled players from the rest, proving that survival is not just about weapons but the precision and strategy behind every shot.

How to Use Sound to Survive Tarkov’s Deadliest Raids

Sound is one of the most powerful tools in Tarkov, often overlooked by inexperienced players. Footsteps, gunfire, reloads, and even environmental noises provide critical information about enemy locations and intentions. Learning to interpret these auditory cues can prevent ambushes, reveal weak points, and allow for precise timing of attacks. In high-stakes raids, sound awareness is often the difference between life and death.

Surviving Tarkov’s deadliest raids requires more than quick reflexes—it demands careful listening. Players who train themselves to detect subtle audio cues can anticipate enemy behavior, plan their routes, and execute strategies without being seen. This psychological edge often lets players control engagements rather than being reactive.

Footsteps and Movement Cues

Footsteps provide invaluable information on enemy positioning. Listening carefully can indicate distance, movement speed, and even whether the player is running or walking. In raids like Customs or Interchange, differentiating between single footsteps and squad movement allows you to prepare ambushes or avoid unnecessary confrontations. Proper audio setup with quality headphones is essential for detecting these subtle differences.

Environmental context also plays a role. Wooden floors, metal catwalks, and gravel make distinctive sounds that, when combined with directional audio, help you predict exact locations. Skilled players use these cues to plan routes, isolate opponents, or execute silent takedowns, maximizing efficiency and survival.

Gunfire and Reloads as Information

Every shot fired gives away more than just the location—it reveals weapon type, distance, and often the player’s position. Understanding weapon sound profiles allows you to determine if the opponent is using a rifle, SMG, or shotgun. By identifying the weapon, you can anticipate engagement style and prepare counter-strategies. Reloading cues indicate vulnerability, presenting opportunities to strike before the enemy regains full combat readiness.

Gunfire patterns, combined with known spawn points or typical routes, can help track enemy squads. Players who pay attention to these auditory cues can set traps, flank enemies, or avoid firefights entirely, conserving health and resources for critical moments. Sound Type Information Revealed Strategic Use Footsteps Distance, movement speed, number of players Plan ambushes, avoid contact, track squads Reloading Vulnerability, weapon type Time attacks, prioritize targets Gunfire Weapon type, engagement distance Predict tactics, reposition, flank Environmental Noise Player movement on surfaces Identify location, plan pathing

Using Sound to Manipulate Opponents

Sound is not only about detection—it can also be used offensively to manipulate opponents. Firing in one direction to bait enemies, creating noise with objects to divert attention, and exploiting environmental echoes can trick even experienced players. These tactics allow for controlled engagements and often result in lopsided fights.

Additionally, recognizing when your own sound output could give away your position is critical. Moving quietly, using suppressors, and timing actions reduces exposure, creating opportunities for surprise attacks or safe extraction. Mastery of both producing and interpreting sound ensures you remain unpredictable while exploiting enemy mistakes.

Conclusion

Sound is one of Tarkov’s most underestimated yet powerful mechanics. Footsteps, gunfire, and environmental cues provide essential information that can be used for both defense and offense. Players who learn to interpret and manipulate sound effectively gain a tactical edge that compensates for weaker equipment or smaller squad size.

By integrating sound awareness into your raid strategy, combining it with positioning, map knowledge, and mental acuity, you can consistently outmaneuver opponents. Understanding the subtleties of audio cues transforms ordinary operators into highly skilled survivors capable of navigating Tarkov’s deadliest raids with confidence and precision.

Survive Tarkov Without Killing Anyone: A Pacifist’s Guide

Escape from Tarkov isn’t always about aggressive combat. For players who prefer a stealthy, non-lethal approach, surviving raids without killing anyone is both challenging and rewarding. This pacifist strategy focuses on avoiding conflict, using terrain to your advantage, and extracting valuable loot safely.

Pacifist players rely heavily on observation, map knowledge, and timing. Every step must be calculated to prevent accidental encounters with PMCs or aggressive Scavs. The key to success lies in patience, environmental awareness, and understanding AI and player patterns.

Movement and Stealth Tactics

Silent movement is crucial for survival. Use crouching, slow walking, and natural cover to reduce visibility. Avoid well-trodden paths and known choke points to minimize the chance of running into hostile players. Trees, rocks, buildings, and shadows become your allies when navigating maps silently.

Additionally, time your movements with environmental sounds, such as gunfire or helicopter noise, to mask your footsteps. Avoiding bright-lit areas and staying near cover ensures that you remain undetected while moving through potentially dangerous zones.

  • Stick to side routes and alleys to avoid main roads
  • Move during environmental noise to mask footsteps
  • Use crouch and prone positions to reduce visibility
  • Avoid high-traffic loot zones unless timing is perfect
  • Observe enemy patterns before deciding on movement

Scav and PMC Interaction

Interacting with AI Scavs requires careful consideration. While some Scavs are predictable, others can unexpectedly attack if they detect you. Avoid firing weapons unless necessary to preserve stealth. Instead, wait for Scavs to move or use their patrol patterns to navigate past them safely.

Player-controlled PMCs are more dangerous because they can anticipate your movements. Observe from cover, avoid engagement, and plan extraction routes in advance. If a PMC spots you, finding an alternate path or hiding until they move away is often safer than confrontation.

Looting Without Alerting Others

Looting quietly is an art in itself. Avoid opening containers that produce loud sounds when possible, and prioritize low-risk loot spots. Extracting valuable items without drawing attention requires patience and situational awareness. Focus on crates, backpacks, and pockets that are often overlooked by aggressive players.

It’s also crucial to know which areas are high-traffic. Avoid these unless you have timed the raid perfectly. Using alternative routes to enter and exit loot areas reduces the chance of confrontation and keeps your pacifist strategy intact.

Map Awareness and Environmental Control

Understanding the map layout is essential for pacifist gameplay. Recognize hiding spots, escape routes, and areas that provide natural cover. Use elevation to gain a view of your surroundings and plan your route accordingly.

Environmental control also involves using containers, fences, and buildings to block line of sight. Maintaining awareness of where enemies may spawn or patrol ensures you can react without engaging in combat.

Survival Mindset

Pacifist Tarkov play requires a calm, deliberate mindset. Rushing or panicking often leads to mistakes and unwanted combat. Plan every move, anticipate enemy actions, and stay patient. Survival without killing is as much about mental discipline as it is about technical skills.

Extracting successfully without combat offers unique satisfaction and allows players to enjoy Tarkov from a strategic and stealth-focused perspective. This approach also prepares you for high-risk raids by improving situational awareness and decision-making skills.

Conclusion

Playing Tarkov as a pacifist is challenging but achievable. By mastering stealth, understanding AI and PMC behaviors, controlling environmental factors, and prioritizing safe looting, you can survive raids without firing a single shot. Patience, observation, and strategic movement are your best weapons.

With practice, a pacifist approach not only becomes viable but also transforms your understanding of Tarkov’s maps, loot dynamics, and enemy psychology, providing a unique and rewarding gameplay experience.

Hidden Secrets on Customs Map Every Player Should Know

Introduction

Customs is one of Escape from Tarkov’s most played maps, known for its early quests, accessible PvP routes, and mix of loot hotspots. But beneath its familiar layout lies a surprising number of hidden secrets—stash locations, obscure quest shortcuts, and underused flanks that can give you a serious edge. Whether you’re a new player learning the layout or a veteran looking to increase your efficiency, uncovering these secrets can transform your success rate. In this guide, we’ll reveal lesser-known tips and secret areas across Customs, helping you move smarter, loot faster, and survive longer.

Hidden Stash Locations Worth Memorizing

Stashes are one of the easiest and safest ways to make money on Customs. Many are tucked into bushes, buried in grass, or hidden against concrete walls. Players who memorize their placements can run efficient routes avoiding high-PvP zones like Dorms. Most stashes contain barter items, food, ammo, and sometimes even armor or weapon attachments. Here’s a table of key stash locations and tips for finding them:

AreaStash LocationNotes
RUAF RoadblockBehind blue fence near white bushOften missed due to low visibility
Train BridgeSouth embankment under pipesEasy access from Sniper Roadblock
Old Gas StationLeft of gate in bush pilePairs well with scav check and quests
ZB-1011 ExtractLeft of main gate inside brick wall cornerSafe to loot while extracting

Quest Shortcuts and Efficiency Routes

Some quests on Customs require crossing long distances or engaging high-traffic areas. However, there are alternative paths and timing strategies that can simplify these tasks. For example, “Delivery from the Past” can be done by entering the Factory office via the window jump, avoiding frontal firefights. “Operation Aquarius” is often rushed, but waiting 5–6 minutes allows you to clear the building with less risk. If you plan your quests in tandem, like combining “Golden Swag” with “Bad Rep Evidence,” you’ll save time and reduce exposure. Use the riverbed under the train tracks as a fast, low-visibility travel route between Warehouse 17 and Customs warehouse areas.

Underused PvP Flanks and Escape Paths

Most firefights on Customs happen in predictable locations—Dorms, Construction, and Checkpoint. But savvy players can use underutilized flanks to gain the upper hand. For instance, flanking Dorms from the Scav checkpoint hill lets you peek 3rd story without taking the front stairs. The jump-over between Stronghold and Warehouse 4 is a perfect route to catch unsuspecting players crossing the main road. You can also bypass the sniper building by running beneath the rail bridge, minimizing line of sight. If you’re being chased, consider crossing the river via the shallow path north of Old Gas and circling back. These flanks can help you reset fights, reposition, or disappear entirely when things go bad.

Conclusion

Customs is far more than a linear quest map—it’s a complex environment full of hidden value. By mastering stash routes, understanding quest shortcuts, and using off-angle flanks, you’ll dramatically increase your efficiency and survival rate. Most players run predictable paths and pay the price. With these lesser-known secrets in your toolkit, you’ll move differently, think ahead, and outplay opponents who rely on routine. Explore Customs with a fresh mindset, and you’ll be rewarded in loot, knowledge, and successful extractions.

Home